


I first saw how to make these giant pictures on Pinterest years ago. Like, before Pinterest was cool. < That is probably a lie because I rarely do anything before it is cool. I did it with an up close picture of Blythe at 8 months old, and my land I loved that thing. It hung in our living room until about Christmas this year when I realized, as a second child, that I needed to take it down unless I did one for Becks. Originally I was just going to do a new one for her, but fell in love with one of Blythe's 3 year pictures and so I just went for it with both of them. Here is the best picture I could quickly find of the picture of Blythe...which, yes, is basically just a selfie with me and Becks...but peek in the background. See it?

Okay. But how do you do it? Because you totally should. It's pretty simple. Here is how.
Find a high resolution picture you love. Sorry, but a picture from your phone won't work for this one. Get out your real camera and snap away, or make sure you have a photo release from your photographer. Put that picture on a flash drive [it's a lot easier than pulling it up from an email] and head to your nearest office store [Office Max, Staples, etc.] [Or have an awesome friend volunteer to do this step for you so you don't have to wrangle children in and out of car seats. Your call.]
Ask for the engineer print. It can only be black and white and it is on paper. Don't let them tell you it is a poster print and let them charge you a photo price. Haggle. You can convince them. I think. Anyway, mine were 2X3 FEET and were just under $5 per picture. Make sure you let the image dry before you roll it up and take it out of the store. These pictures aren't absolutely crisp, but they really are pretty great if you make sure your originally image isn't blurry and is high resolution.


Then run over to Lowes. You could go to Home Depot or Menards, I suppose, but we go to Lowes. Grab some foamboard--it's for home insulation. The person in the vest will know what you're talking about. It's about $11 and you can get at least two pictures [of this size] out of it. If you can fit it in your vehicle full size, don't let them cut it in half for you in the store because in my experience they didn't cut straight and it could lessen the amount of pictures you get out of the board. Just saying. But if they must, just make sure they cut it with enough margins for you to get the pictures out of it that you need. [If you click on the link at the beginning of this post, she shows you how to mount it to a board if you want it sturdier.]

Now the fun part.
Get out your mom's electric meat knife that she probably got as a wedding gift. Seriously. Find an electric meat knife. It works so much better than an exacto knife. TRUST ME. And it's a lot quicker. Measure where you need to cut and mark it and cut it as straight as possible. If yours is perfectly straight tell me your ways.


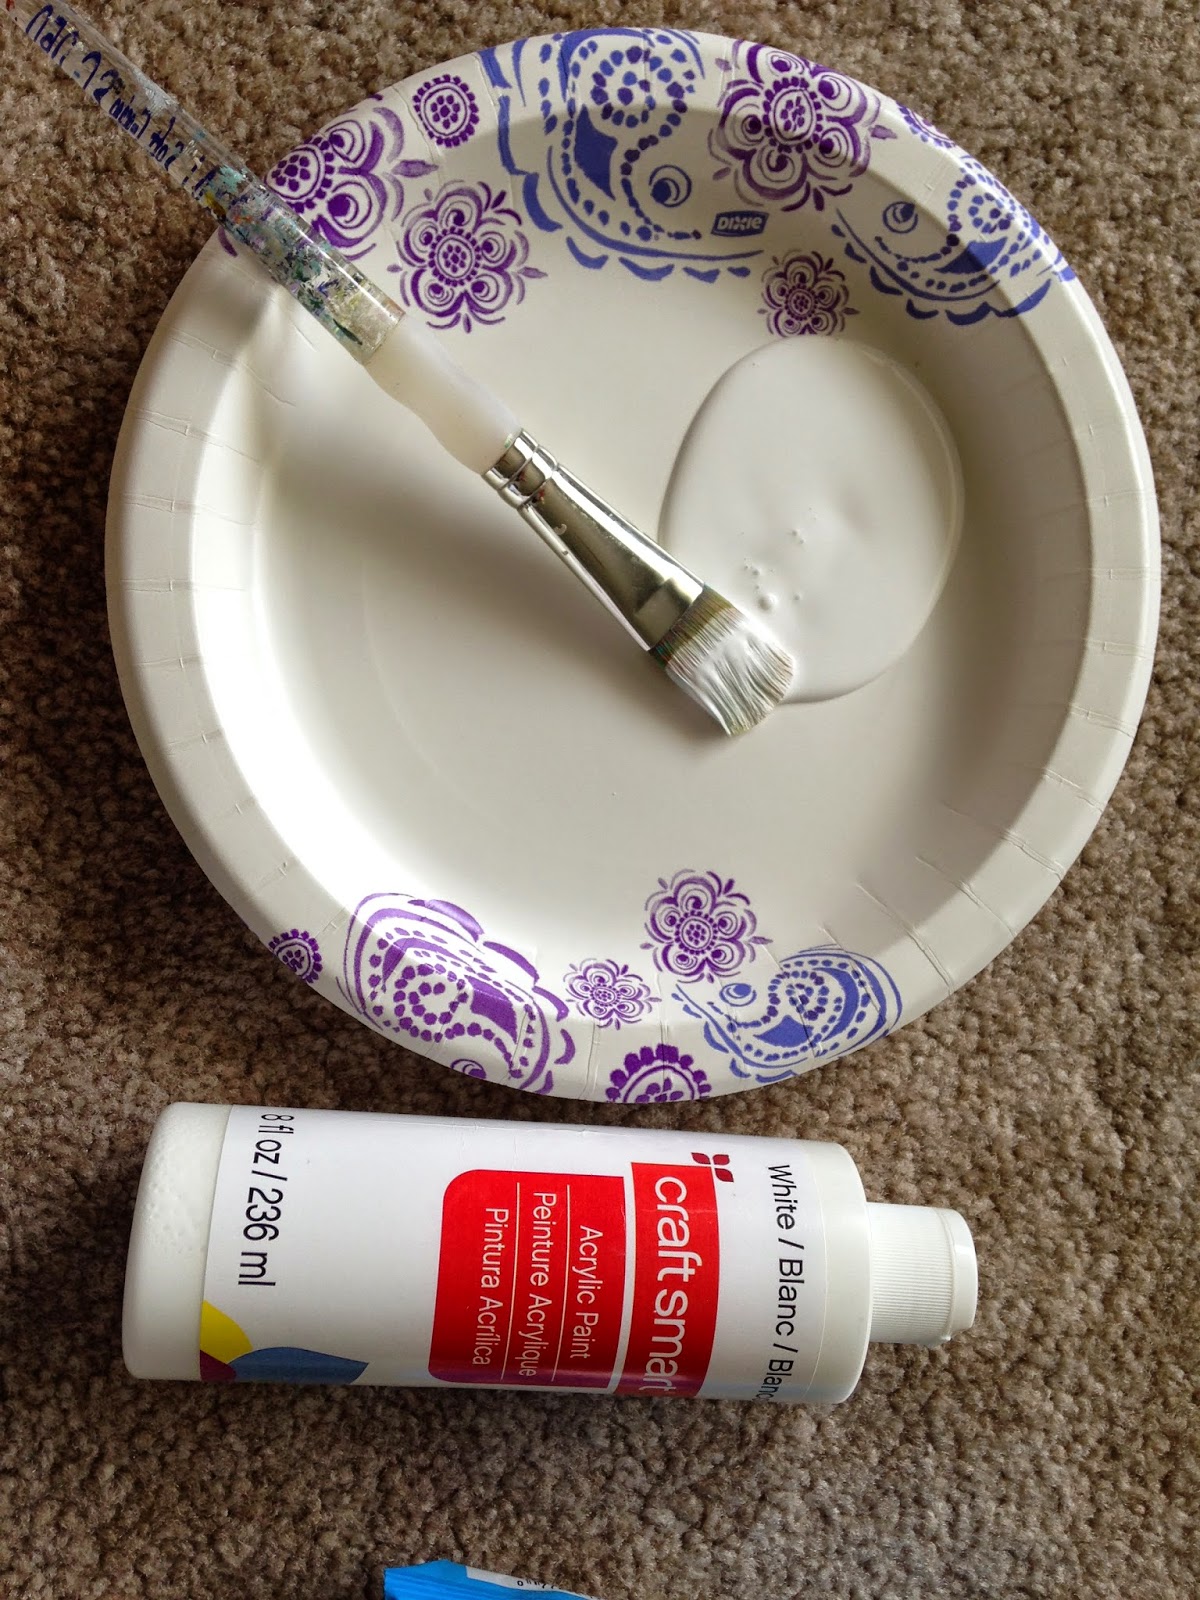
Once you have the foam board cut, bust out your paint and paint around all the edges [while watching Friends on Netflix, preferably]. Spray paint won't work. It eats the foamboard. If you don't believe me, try it. Do a couple layers of paint as it tends to soak in. Also, I like to paint the edges and come around the side a little bit in case my picture doesn't go on straight or some of the board is showing [because it is really difficult to get your picture on straight. ]


Allow a few hours for the paint to dry. Next, get out your spray glue. I used Elmer's both times and it has held like a dream. I made the first picture 2.5 years ago and that picture still isn't budging. This step is best done with a little help. Spray on your glue in an even layer. Really layer it on there too [I used almost the entire can by time I was done with both pictures]. Then enlist someone to hold the picture for you and slowly and meticulously place it on the board. Start on one end and carefully push it down, rubbing out bubbles as you go. If you've never used spray glue before, it's intense. Once you lay that picture on there it is on there. Which is why my picture of Becks ended up crooked and it makes me so upset...but whatever. I'm working through it.

Press the picture down once more by gently rubbing your palm over the picture, especially at the edges.

AND YOU'RE DONE! It's really super easy. And now let me show you how I messed up, so you'll feel better when you do [but you probably won't because you're better than I am]. Maybe if you cut the board slightly smaller than your image, and then trim the picture after placing it on the board?

See. That's why I paint up over the edge a bit. Okay. I need to stop looking at this because it's upsetting me again. Glad I don't have a ton of $$$ invested in this :). When you come to my house, just don't mention it.

Also, sorry about the phone pictures. It was late and I just wanted to be finished and didn't want to get my big camera. You understand.

And here is how I hang them: Push pins. Seriously. I just make a little indention in the foam board on the back where the pin will be and I hang them that way. They are super light so they don't require much. You could even use 3M strips if you're weird anxious unsure about holes in your wall.

I was originally making these for my bedroom. We recently rearranged and had a perfect location about our bed. But they were just too awesome to hide away in our bedroom. So I made a spot for them in the main area of our home. I love that from the living room when you see them they are just below the sign I made a few years ago that says, "What I love most about my home is who I share it with." These two little ladies sure make our home a lot of fun.

 |
| that is one of the lights left in our home that is originally. Brent hates it. |
You can see that the foam doesn't look fancy by any means, but it really does finish off the picture and almost looks like it is a giant canvas [for probably about 1/20th of the cost].


I knew Blythe would like them, and she noticed them first thing the day after I hung them up. What surprised me was Becks' reaction: she loves them. I ask her where Blythe is and she points and she knows which one is her as well. They really are fun... the pictures and the girls.

Now let me know if you make one and how it turns out! And if you have any pointers on getting your picture on there perfectly straight.

1 comment:
Love this! Oh. And I got my hair cut today and am "working through" that, too.
The best part of menopause is that you really don't care. You can quote me on that. :D
Post a Comment